This year, we’ve made several exciting updates to both our hardware and our software. Among that list of updates, we’ve changed one of my favorite features: Geofences.
In the past, the DroneMobile geofence feature was pretty standard. Our software only allowed for the creation of a radius. Now, when you check out our geofence feature, you may have noticed we now let you create multiple shapes. You can also set POIs in addition to your regular geofences.
What is a Geofence?
Before we dive into how to create a geofence, let’s define Geofence and POI. Below you’ll find several examples of circumstances in which you will find one of these features useful.
But first, here are the definitions:
A geofence is an area, kind of like a boundary. When your vehicle enters and/or exits this area, you’ll receive an alert.
On the other hand, a POI is a specific address or location. When your ignition turns off or on at this location, you’ll receive an alert.
These features are versatile, so you can use them whenever it suits your needs! To help you understand what’s possible with geofences and POIs, here are several real-life scenarios in which a geofence or POI is useful:
Parents are often trying to find creative ways to keep track of their teenagers. Want to know if your kids are arriving on time? Set a POI at their school to know exactly when they arrive and when they leave for the day.
If you own a small business with a fleet of vehicles, you might want to know when one of your fleet enters or exits a certain town or neighborhood, for this circumstance, a geofence will be a perfect solution.
How to Set up a Geofence
We've made setting up geofences easier than ever before! Now you can use all of your GPS features through your account at accounts.dronemobile.com and through the DroneMobile app!
Accounts.DroneMobile.com
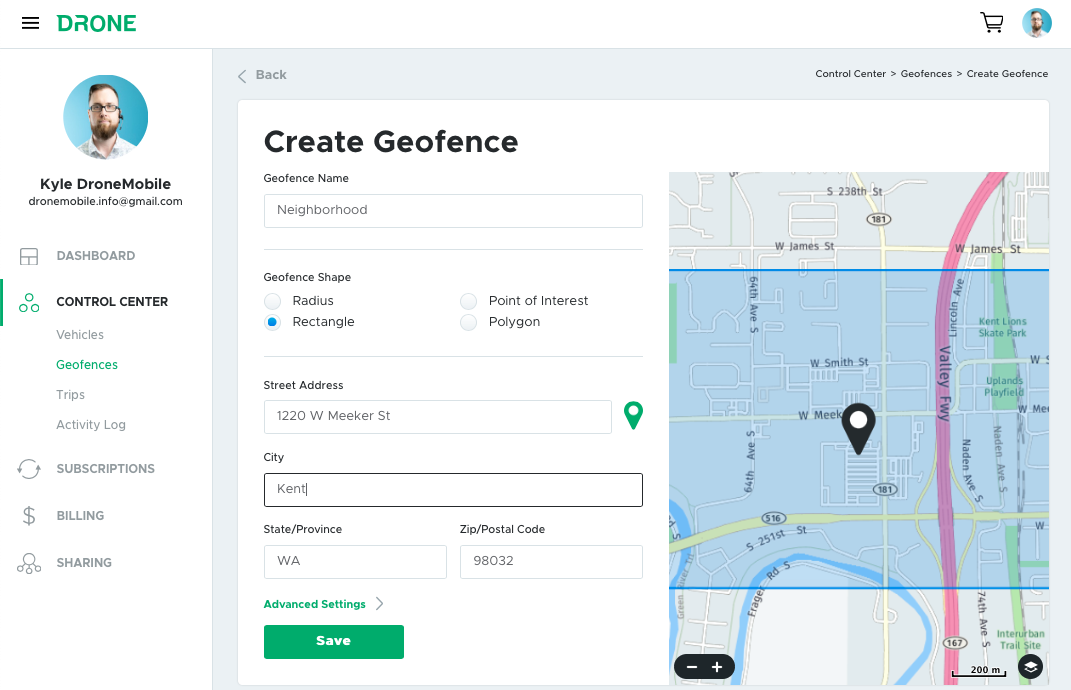
First, begin by logging in at accounts.dronemobile.com. Then, click on the geofence tab in the left-hand navigation menu.
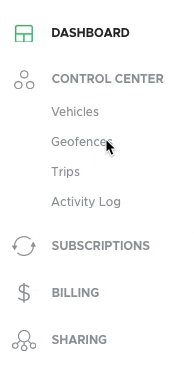
Here, you’ll see all of your existing geofences, as well as an option, in the upper right-hand corner, to “Create New Geofence.”
Here you’ll see where you can input your geofence location on the left, and a map where you can shape your geofence on the right.
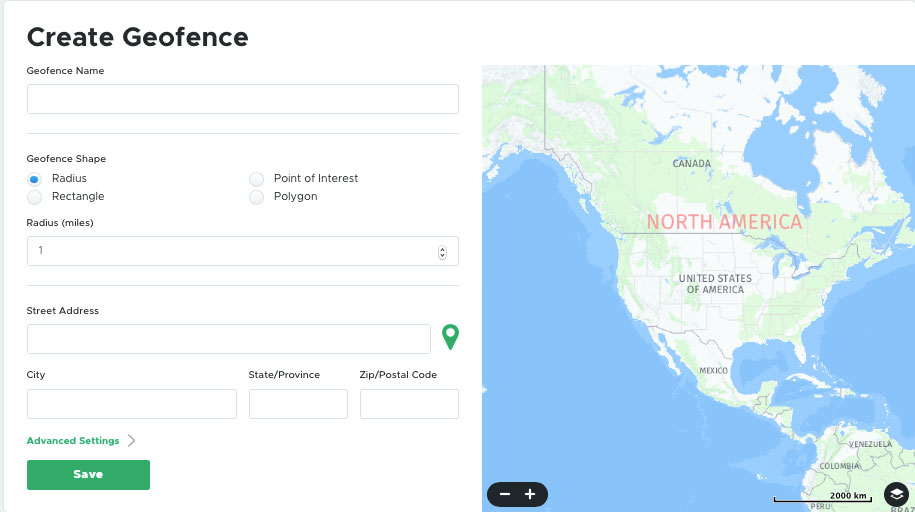
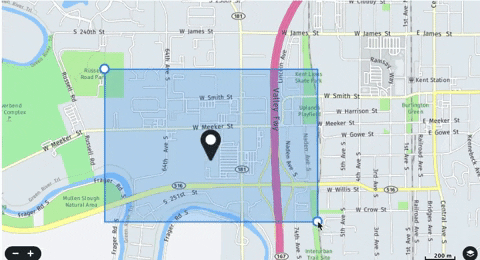
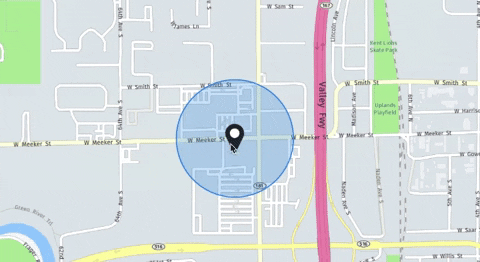
Creating a geofence is pretty simple! Begin by choosing a name, like “Home” or “Work.” Then you can select your shape, which will populate on the map once you input your address.
Note: Rectangular and polygonal geofences are only available for those with X1 Hardware and a Premium or above subscription.
You can either input an address or click the green pin to the right of the address field to use your current location.
If you want to make a large geofence, one which would cover an entire town or neighborhood, for example, you can zoom out the map, enabling you to view the entire area.
When inputting an address for a geofence, it’s best to find that area's central location. However, once your shape has populated on the map, you can drag the boundary anywhere you please by clicking and dragging the center or the dots.
Once you’ve created your shape and placed it over the correct area, you’ll be prompted to choose the vehicles for which you’d like to apply this geofence. You can even choose whether or not you’d like to receive alerts for the arrival, departure, or both.
Finally, press save and you’re good to go! Now when you visit the main geofence page, you’ll see your new geofence listed.
The DroneMobile App
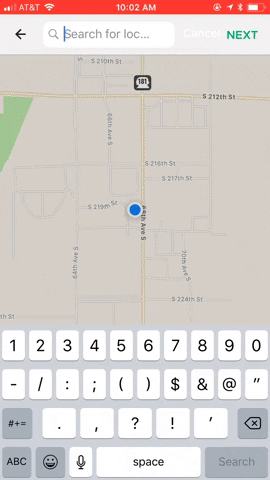
Creating a geofence within the app is pretty similar to how you do it through your online account. First, log into your DroneMobile app, and click the cake menu in the top left-hand corner of your screen.
Next, click geofences in the left-hand navigation, opened by the cake menu.
Then, click the plus sign in the top right corner to create a new geofence.
Clicking this will throw you directly into the map, and the different geofence shapes will populate below.
Type the location into the search bar, and select the geofence shape you prefer. If you want to use your current location, simply input “My Location” to the search bar.
Note: Rectangular and polygonal geofences are only available for those with X1 Hardware and a Premium or above subscription.
Once you’ve selected your geofence shape, you can adjust it by dragging the circles, as shown in the gif above.
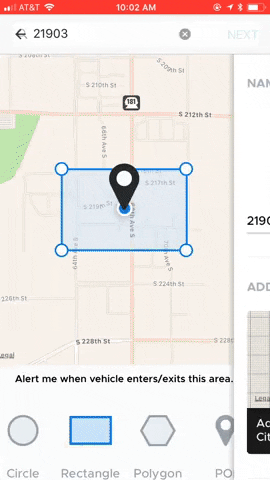
When you’ve covered the desired area, click "Next" in the upper right-hand corner, add a photo, give your geofence a name, select which vehicles you’d like to apply it too, and save your geofence.
And there you have it! That’s how you create a geofence through your online account and the DroneMobile app.
Latest Stories
Tracking Anything, Anywhere with the All-New Drone XT
Drone XT (model #: XT-LTE) is a universal, battery-powered GPS tracker that can be magnetically mounted to any valuable asset. I
May 11, 2026
Read More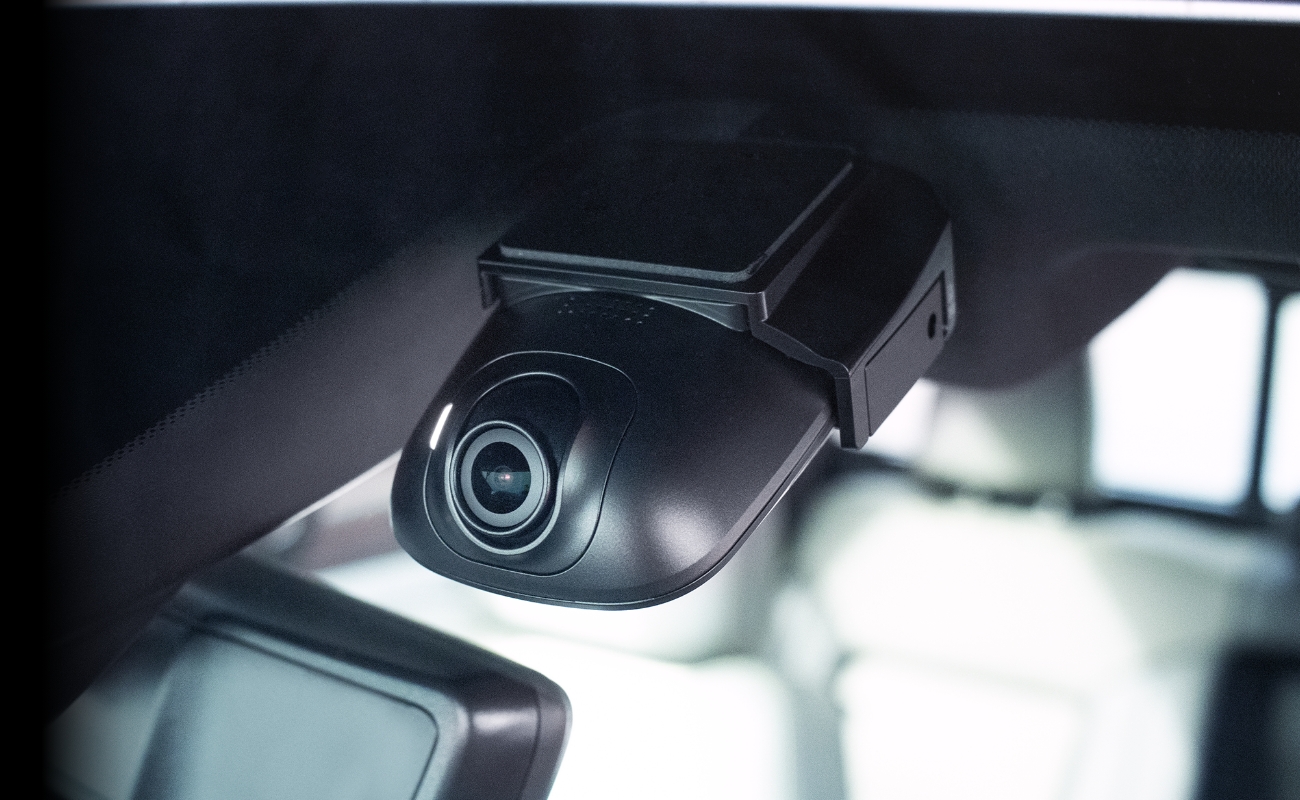
Why Dash Cams are the Future of Vehicle Security
As a Compustar and DroneMobile user, you’re part of a community that prioritizes being "in the know." You’ve experienced the peace of mind that comes with remote start, GPS tracking, and instant security alerts.
Apr 29, 2026
Read More
Getting to Know Your DroneMobile System
You and your vehicle are now connected like never before. As with any new technology, you might be wondering exactly where to start to get the most out of your experience.
Mar 4, 2026
Read More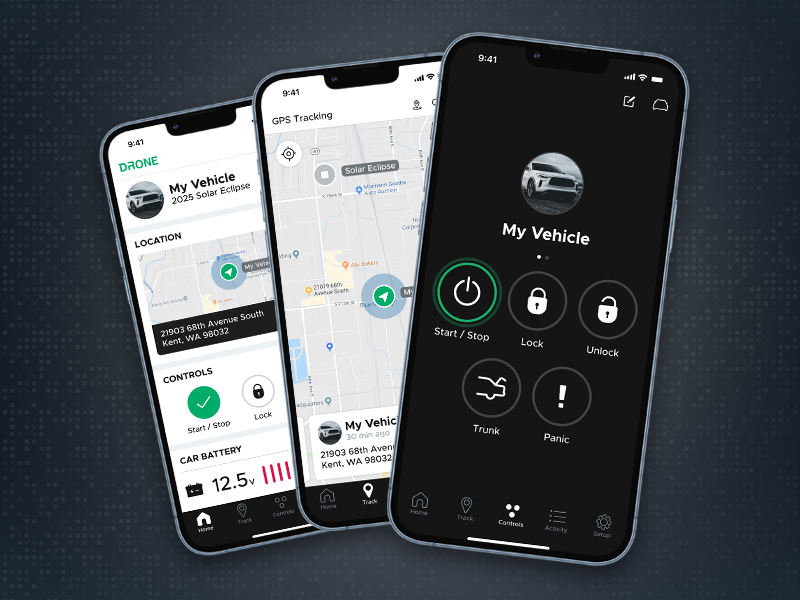
Which DroneMobile Plan do I need?
DroneMobile offers a range of plans designed to fit every driver's lifestyle. Whether you just want the convenience of warming up your car from your office or you need to manage a fleet of service vehicles, there is a tier for you.
Feb 2, 2026
Read More
DroneMobile Just Got an Upgrade - Introducing the Updated Web App!
The DroneMobile Team is thrilled to announce the launch DroneMobile's updated desktop web application, now live at https://accounts.dronemobile.com!
Oct 26, 2025
Read More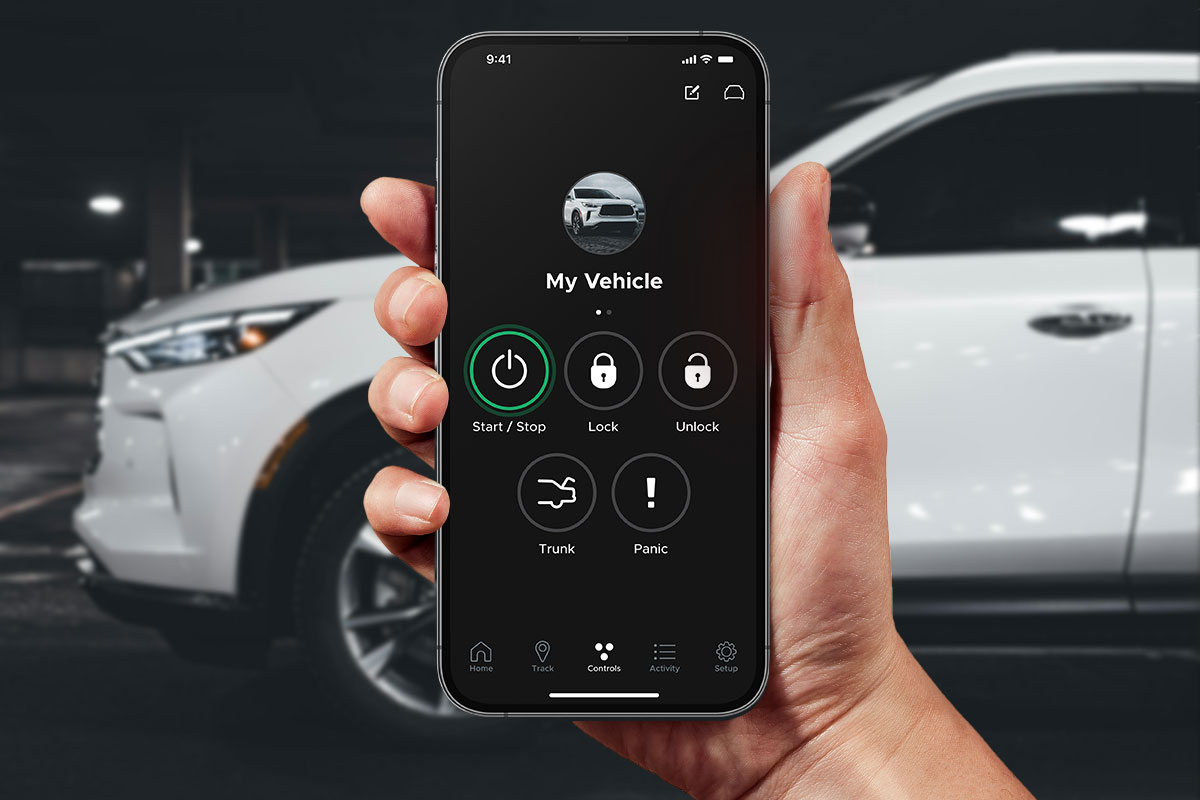
An Important Update Regarding DroneMobile Subscription Pricing
Today, we want to share an important update regarding our subscription plan pricing. Effective June 1st, 2025 we will be making a moderate price adjustment to select 3-year and 5-year* subscription terms. These changes will affect all renewals that take place after June 1st, 2025.
May 12, 2025
Read More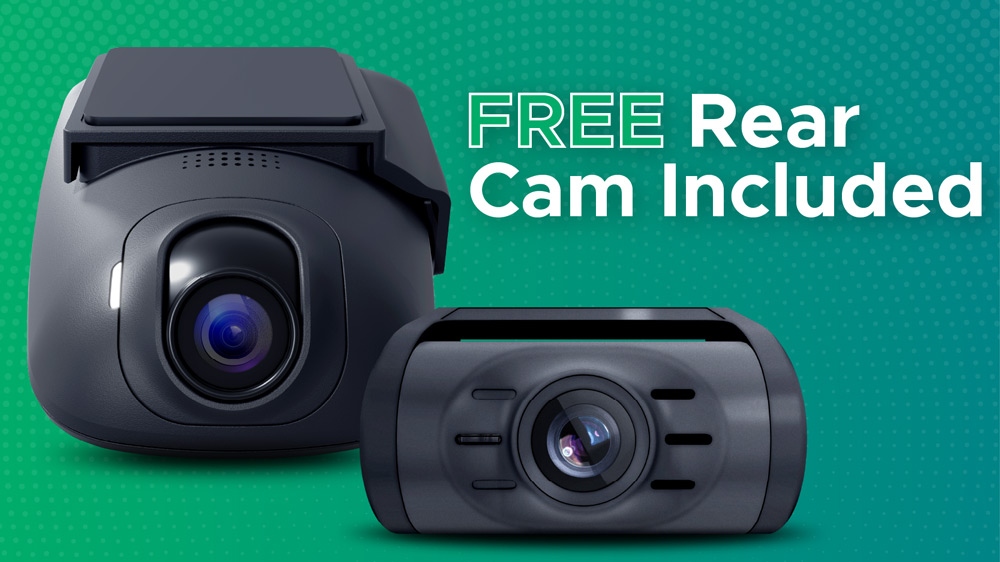
Get a Free Rear Camera for Drone XC - May 2025
The Drone XC Dash Cam System, paired with its complimentary rear-facing camera, offers a comprehensive solution for safer driving. Get it now before this offer expires May 31st, 2025.
May 6, 2025
Read More
Drone X2MAX-LTE and DroneMobile App Now Supporting Advanced Vehicle Health Data via CAN
Firstech, maker of DroneMobile connected car solutions, today announced shipment of the Drone X2MAX-LTE telematics device for vehicles. This powerful new offering provides consumers and fleet users with an all-in-one tracking and security solutions for protecting their vehicles.
Feb 23, 2025
Read More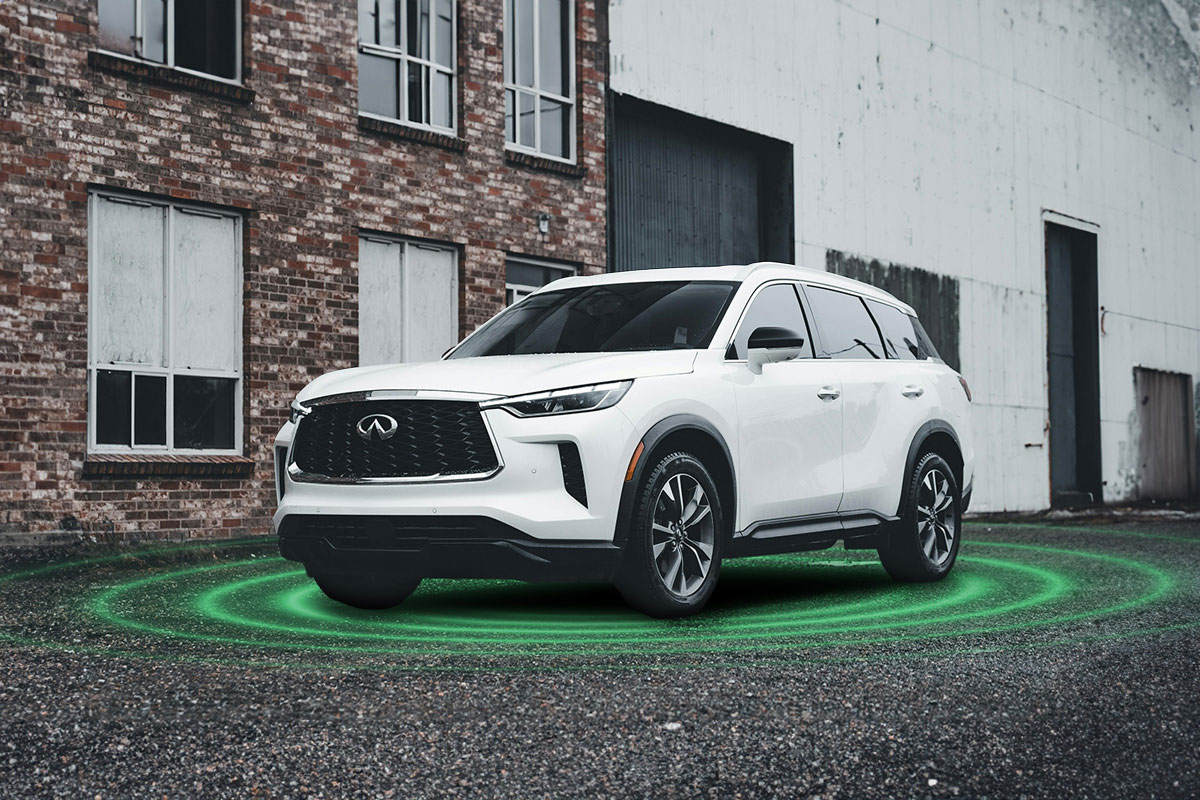
How Drone XC is Making Parking Mode Smarter
Drone XC solves this problem by making parking mode smarter. This is possible via our “Event” mode, which activates parking mode only when the system is armed.
Dec 5, 2024
Read More
Tracking Anything, Anywhere with the All-New Drone XT
Drone XT (model #: XT-LTE) is a universal, battery-powered GPS tracker that can be magnetically mounted to any valuable asset. I
May 11, 2026
Read MoreWhy Dash Cams are the Future of Vehicle Security
As a Compustar and DroneMobile user, you’re part of a community that prioritizes being "in the know." You’ve experienced the peace of mind that comes with remote start, GPS tracking, and instant security alerts.
Apr 29, 2026
Read MoreGetting to Know Your DroneMobile System
You and your vehicle are now connected like never before. As with any new technology, you might be wondering exactly where to start to get the most out of your experience.
Mar 4, 2026
Read MoreWhich DroneMobile Plan do I need?
DroneMobile offers a range of plans designed to fit every driver's lifestyle. Whether you just want the convenience of warming up your car from your office or you need to manage a fleet of service vehicles, there is a tier for you.
Feb 2, 2026
Read MoreDroneMobile Just Got an Upgrade - Introducing the Updated Web App!
The DroneMobile Team is thrilled to announce the launch DroneMobile's updated desktop web application, now live at https://accounts.dronemobile.com!
Oct 26, 2025
Read MoreAn Important Update Regarding DroneMobile Subscription Pricing
Today, we want to share an important update regarding our subscription plan pricing. Effective June 1st, 2025 we will be making a moderate price adjustment to select 3-year and 5-year* subscription terms. These changes will affect all renewals that take place after June 1st, 2025.
May 12, 2025
Read MoreGet a Free Rear Camera for Drone XC - May 2025
The Drone XC Dash Cam System, paired with its complimentary rear-facing camera, offers a comprehensive solution for safer driving. Get it now before this offer expires May 31st, 2025.
May 6, 2025
Read MoreDrone X2MAX-LTE and DroneMobile App Now Supporting Advanced Vehicle Health Data via CAN
Firstech, maker of DroneMobile connected car solutions, today announced shipment of the Drone X2MAX-LTE telematics device for vehicles. This powerful new offering provides consumers and fleet users with an all-in-one tracking and security solutions for protecting their vehicles.
Feb 23, 2025
Read MoreHow Drone XC is Making Parking Mode Smarter
Drone XC solves this problem by making parking mode smarter. This is possible via our “Event” mode, which activates parking mode only when the system is armed.
Dec 5, 2024
Read More